
The most basic usage is to simply give Timelens the name of a video file. Timelens will create a visual timeline from the video, using a default size of 1000x100 pixels, and the default filename INPUT_FILE.timeline.jpg.
Run this command in a terminal:
$ timelens video.mp4to create the following file:

You can override the filename and the timeline's size explicitly:
$ timelens video.mp4 --timeline timeline.jpg -w 1000 -h 500
The second thing Timelens can do is creating thumbnail grids. To keep the individual files small, Timelens will often split the thumbnails into several files. It will also create a text file in the VTT format, which references the thumbnails' positions.
$ timelens video.mp4 --thumbnails thumbnails.vtt
WEBVTT

00:00.000 --> 00:05.786
thumbnails-00.jpg?xywh=0,0,161,90

00:05.786 --> 00:11.572
thumbnails-00.jpg?xywh=161,0,161,90

00:11.572 --> 00:17.358
thumbnails-00.jpg?xywh=322,0,161,90

...
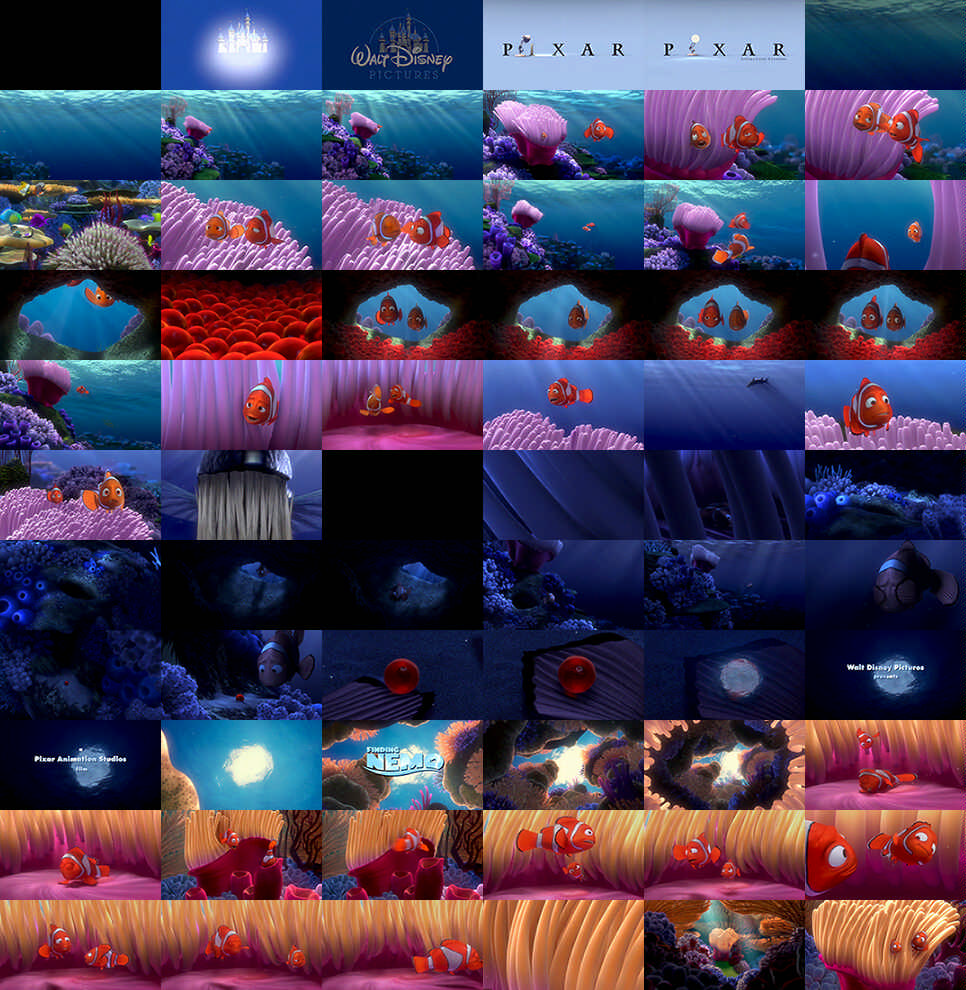
Timelens will also create one or more JPEG files containing the thumbnails, which are referenced from the VTT file. Here's the first one:

$ timelens
timelens 0.1.1
Sebastian Morr <sebastian@morr.cc>

Timelens creates visual timelines from video files, which visualize
the videos' color development and can be integrated into video players.
That way, users can navigate videos more precisely and actively.

Additionally, Timelens can create thumbnail grids, which can be used
to display preview images when the user hovers over the visual timeline.
Timelens can output a VTT file, which references the thumbnails' positions.

Project homepage: https://timelens.io

USAGE:
    timelens <INPUT_FILE>

OPTIONS:
    <INPUT_FILE>
            Name of the input video file.

    -w, --width <NUM>
            Width of the visual timeline in pixels [default: height*10, or 1000, if height is unspecified].

    -h, --height <NUM>
            Height of the visual timeline in pixels [default: width/10].

        --timeline <JPEG_FILE>
            Create a visual timeline from the input file, which visualizes its color development. The result will be written to the specified file in JPEG format
            [default, if neither `--timeline` nor `--thumbnails` is used: INPUT_FILE.timeline.jpg].
        --thumbnails <VTT_FILE>
            Extract thumbnails from the input file, in the form of one or several thumbnail grids. A VTT file referencing the thumbnails' positions will be written to
            the specified location. The number of thumbnails corresponds to the `--width` option, because the thumbnails are meant to be used together with the visual
            timeline.
    -H, --thumbnail-height <NUM>
            Height of the individual thumbnails in the thumbnail grids. Their width is derived from the video's aspect ratio [default height: 90].

        --help
            Print help information.

        --version
            Print version information.

EXAMPLES:
    timelens video.mp4
            Generate a visual timeline called 'video.mp4.timeline.jpg' of default size.
    timelens video.mp4 --timeline timeline.jpg -w 1000 -h 500
            Override size and name of the timeline file.
    timelens video.mp4 --thumbnails thumbnails.vtt
            Generate thumbnail grids and a corresponding VTT file referencing their locations.
Now that you have some timelines and thumbnails, let's display them on your website!